All ATM processing comes with Online Real-Time ATM monitoring through Columbus Data Services (CDS). You can now log in online through (CDS) and view all transactions in real-time status, allowing you to view transactions as they happen.
Processing with Columbus Data Services online access will allow you to view daily, monthly, and yearly transaction reports for all of your ATM machines.
Online access also allows you to view all ATM machine errors and notifies you when cash levels are low.
Columbus Data Login Instructions
Step 1: Go to the Web Tools Login Page: https://columbusdata.net/cdswebtool/login/login.aspx.
Step 2: Enter your Logon Name and Password. Your password must contain a minimum of eight characters (one character must be numeric and one character must be capitalized.) Click “Log in.”
How to use Columbus Data Online reporting
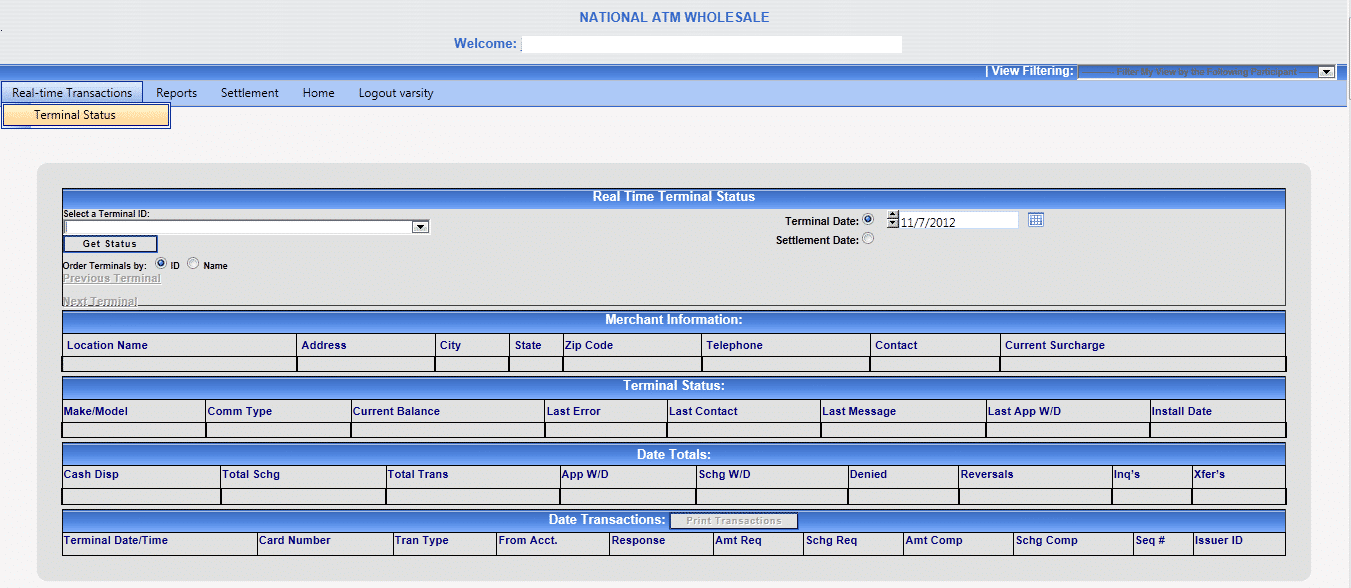
For Real Time Status
- Take your cursor to “real time transactions.” In the drop down menu, you will see “Terminal Status”. Click Terminal Status. This will direct you to the “Real Time Terminal Status” page.
- Select an ATM terminal to view in the drop down box to the left of the screen located under “Select a Terminal ID.” Click the “Get Status” button.
- To the right of the screen, select the date you would like to view before hitting the “Get Status” button.
- Real Time Transactions is showing 12:01 am to 12:00pm midnight of the same day.
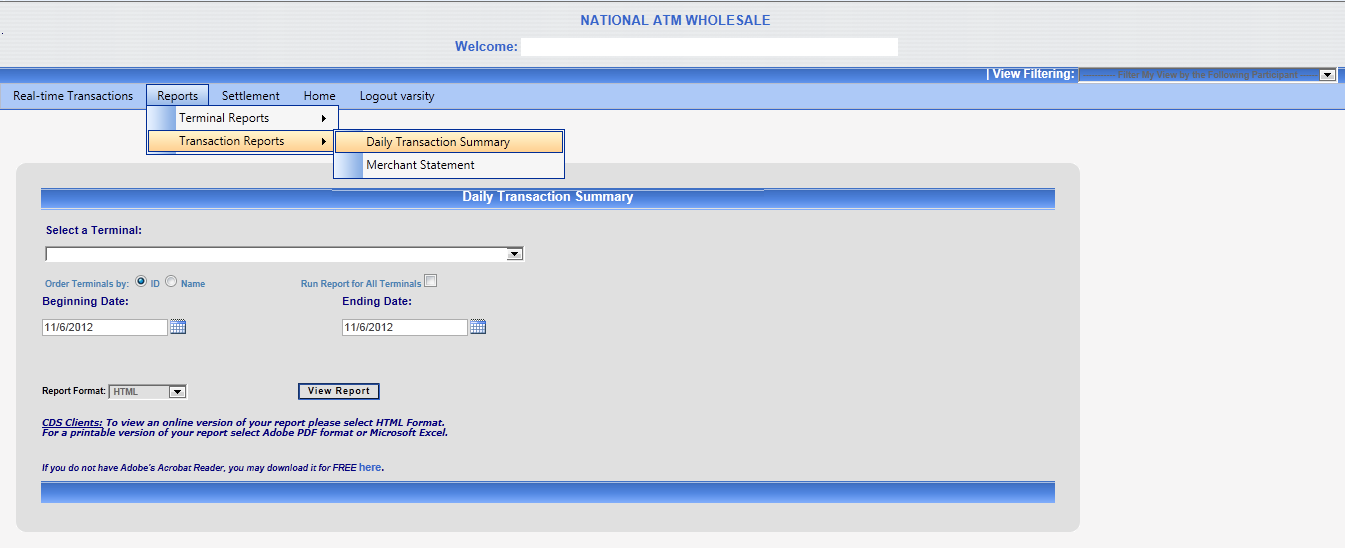
For Daily Reports
- Take your cursor to “Reports.”
- Scroll down to “Transaction Reports” then over to “Daily Transaction Summary.”
- Click “Daily Transaction Summary”.
- Select a terminal to view in the drop down box under “Select a Terminal.”
- Select a “Beginning Date” and an “Ending Date.”
- Click “View Report”.
This will pull a report for all transactions that occurred between the selected “Beginning Date” and “Ending Date”.
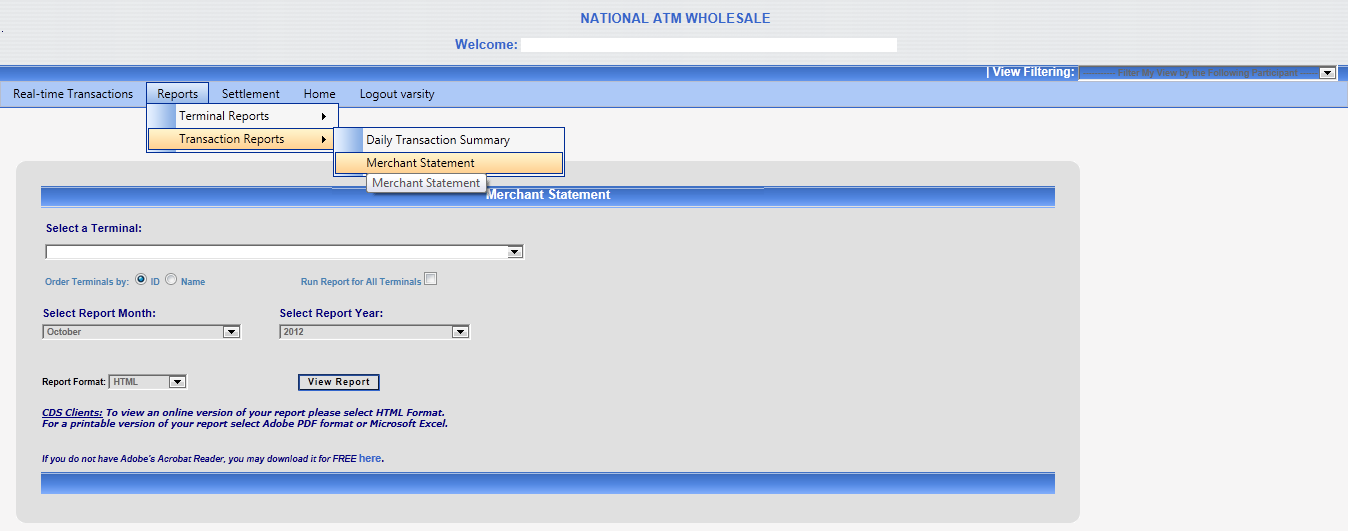
For Monthly Reports
- Take your cursor to “Reports.”
- Scroll down to “Transaction Reports,” then over to “Merchant Statements.”
- Click “Merchant Statements.”
- Select a terminal to view in the drop down box located under “Select a Terminal.”
- Select a month to view in the drop down box located under the “Select Report Month.”
- Select the year that you would like to view in the drop down box located under the “Select Report Year.”
- Click “View Report”.
** Go down to “Report Format” and click HTML and drop down to ADOBE PDF and click. It prints better and is easier to view. Click view report and then print.
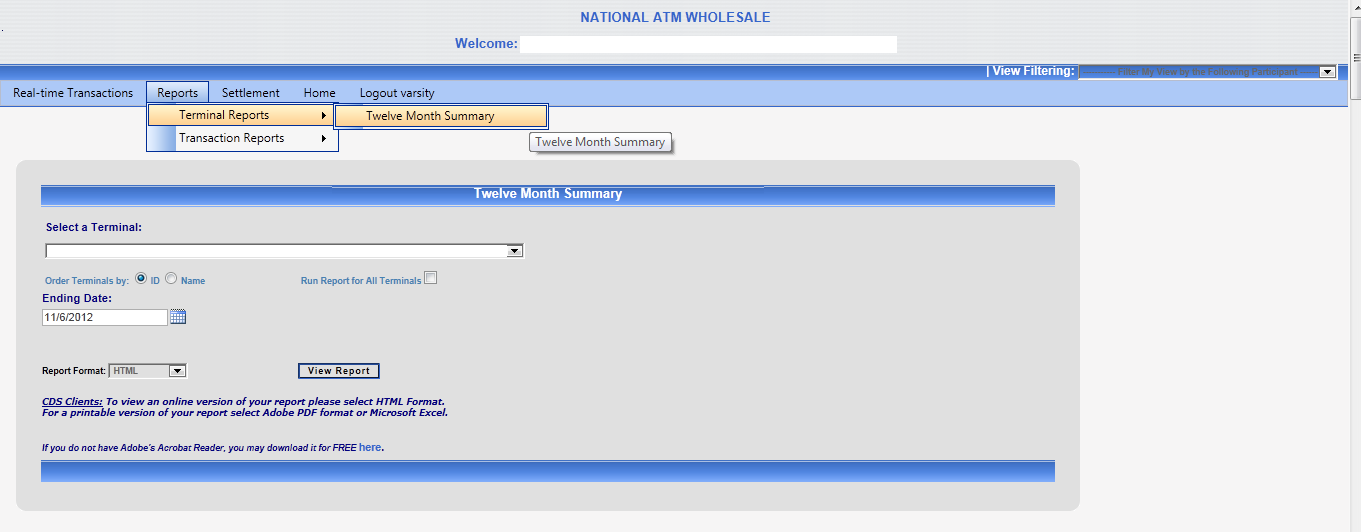
For Yearly Reports
- Take your cursor to “Reports.”
- Scroll down to “Terminal Reports” and then over to “Twelve Month Summary.”
- Click “Twelve Month Summary”.
- Select a terminal to view in the drop down box under “Select a Terminal.”
- Select an “Ending Date.”
- Click View Report.
This will pull an annual report going back 365 days from the “Ending Date” selected.